How to Get Insurance to Pay for a New Roof: A Step-by-Step Guide
August 20, 2024
A new roof can be a significant investment, but if your roof has been damaged due to a storm or other covered event, your homeowner’s insurance might cover the cost. Navigating the insurance claim process can be complex, but with the right approach, you can increase your chances of getting the coverage you need. Here’s a step-by-step guide to help you through the process:
1. Assess the Damage
Before contacting your insurance company, it’s crucial to evaluate the extent of the damage. Inspect your roof for visible signs of wear and tear, such as missing shingles, leaks, or structural damage. Take detailed photos of the damage to document your findings. This evidence will be valuable when filing your claim and communicating with your insurer.
2. Review Your Insurance Policy
Understanding your insurance policy is essential before filing a claim. Review your coverage to determine if roof damage from storms or other perils is included. Pay attention to your policy’s terms, deductibles, and any exclusions that might affect your claim. If you’re unsure about any aspects of your policy, reach out to your insurance agent for clarification.
3. Contact Your Insurance Company
Once you’ve assessed the damage and reviewed your policy, contact your insurance company to report the claim. Provide them with detailed information about the damage and submit the photos you took. It’s important to report the claim as soon as possible, as some policies have time limits for filing claims after damage occurs.
4. Schedule an Inspection
Your insurance company will likely send an adjuster to inspect the damage and assess the extent of the repairs needed. Be present during the inspection to ensure that the adjuster sees all the damage and that their assessment aligns with your findings. Provide any additional documentation or information that might help support your claim.
5. Get Repair Estimates
Obtain estimates from reputable roofing contractors for the cost of repairs or a full roof replacement. These estimates will help you understand the potential costs and provide a basis for your claim. Share these estimates with your insurance company to support your request for coverage.
6. Review the Adjuster’s Report
After the adjuster’s inspection, you’ll receive a report detailing their findings and the amount the insurance company is willing to cover. Review this report carefully to ensure it accurately reflects the damage and necessary repairs. If you disagree with the report, you can negotiate with your insurance company or seek a second opinion from an independent adjuster.
7. File a Claim for Payment
Submit a formal claim for payment based on the adjuster’s report and the repair estimates you’ve gathered. Ensure that all required documentation is included and that your claim is complete. Follow up with your insurance company to check on the status of your claim and address any questions or concerns they may have.
8. Complete the Repairs
Once your claim is approved, you’ll receive funds to cover the cost of repairs or a new roof. Hire a qualified roofing contractor to complete the work and ensure that the repairs meet industry standards. Keep detailed records of all work performed and any payments made for your records and future reference.
9. Follow Up and Appeal if Necessary
If you encounter any issues or your claim is denied, don’t hesitate to follow up with your insurance company. You have the right to appeal the decision and provide additional evidence or documentation to support your case. Working with a public adjuster or an attorney specializing in insurance claims can also be helpful if you face significant challenges.
Getting insurance to pay for a new roof involves careful planning, documentation, and communication with your insurance company. By following these steps and staying organized throughout the process, you can improve your chances of receiving the coverage you need and getting your home back in top condition.
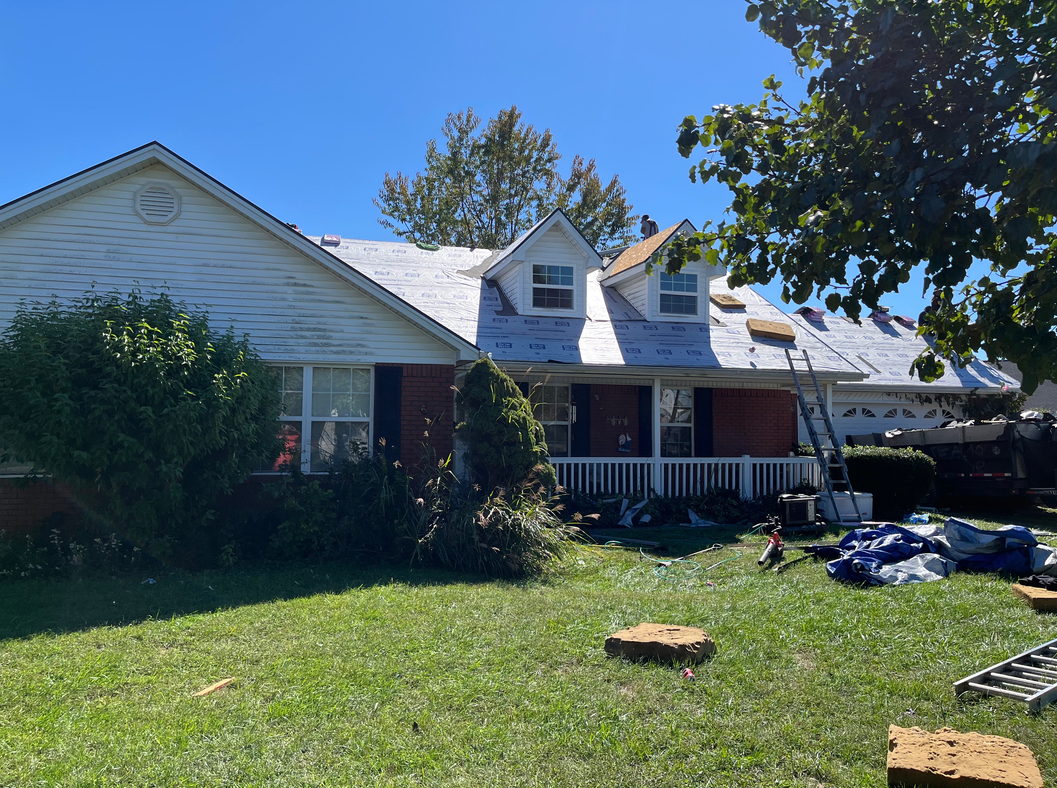
Richmond, Kentucky homeowners rely on Ark Covering & Restoration for roof inspections addressing storm damage, aging shingles, and pre-sale evaluations across Madison County. Inspections identify leaks, missing shingles, and wear common in roofs over 10 years old. Ark Covering & Restoration also assists with insurance claims, guiding clients through documentation and adjuster meetings for storm-related roof damage throughout Richmond. Key Takeaways Professional roof inspections in Richmond, KY identify issues before they become expensive major repairs. Roofs over 10 years old require professional inspection to prevent storm damage and leaks. We offer free written quotes and lifetime warranties on installed shingle systems. Richmond's rental and student housing near Eastern Kentucky University experiences significant deferred maintenance issues. Why Do Richmond Roofs Need Extra Attention? Rapid growth explains much of the pressure on Richmond roofs. New neighborhoods keep expanding along the bypass. Every one of those structures faces the same demanding mix of Kentucky heat, wind, and winter ice. Storms can strike Richmond unexpectedly, often leaving significant damage behind before homeowners notice a single dripped ceiling tile. That gap between the storm event and the visible leak is exactly where costly problems take root. Madison County's housing mix adds another layer of risk. A large share of properties near Eastern Kentucky University serve renters and student tenants. Maintenance on these homes frequently gets deferred. Roofs in this segment often get inspected only after water has already reached the interior. A far more expensive scenario than catching wind-lifted shingles early. Why Does Rental Housing Near EKU Face More Roof Risk? Landlords juggling multiple properties near campus sometimes push routine roof checks down the priority list. Small issues, like a cracked flashing seal or a few missing shingles, go unnoticed for months. By the time a tenant reports a leak, the damage has usually spread into decking and insulation. Homeowners across Richmond benefit from a short mental checklist before storm season: Note any recent hail or high-wind events in the neighborhood. Check for missing or curling shingles from the ground. Watch for water stains on interior ceilings. Schedule inspections before renewing a rental lease. At Ark Covering & Restoration we understand these local patterns and know where damage tends to hide first. Ark Covering & Restoration serves Richmond homeowners with roof replacement and storm damage restoration built for exactly this kind of risk. When Should You Schedule A Roof Inspection? Three warning signs it's time to call a professional: a roof past its 10th birthday, recent storm exposure, or visible leaks and missing shingles. Waiting until water stains appear on a ceiling means the damage has already spread past the shingle layer. Madison County's mix of aging housing stock and unpredictable seasonal storms makes timing especially important. How Often Should A Roof Be Inspected? Routine inspections belong on the calendar once a year, ideally during spring or fall. This schedule catches wear before winter ice or summer heat turns small issues into structural ones. Homeowners who skip annual checkups often discover problems only after a leak has already reached the attic. What Happens During A Storm Damage Inspection? A storm damage inspection determines the true extent of harm to a roof, not just what's visible from the driveway. The process starts with an initial assessment of surface damage, which guides every decision that follows. We examine flashing, granule loss, and soft spots that untrained eyes miss. Richmond residents facing recent severe weather don't need to wait weeks for answers. Ark Covering & Restoration provides free roof inspections and insurance claim assistance. Consider scheduling an inspection if any of the following apply: The roof is more than 10 years old A storm has recently passed through Madison County Shingles are missing, curling, or visibly damaged Leaks have appeared inside the home Acting early protects both your roof and your wallet. What Happens During A Professional Inspection? A detailed roof examination goes far beyond a quick glance from the driveway. We check flashing, decking, ventilation, and shingle condition point by point, documenting anything that could compromise a Richmond home. Madison County weather doesn't leave obvious calling cards after every storm. Damage can hide under shingles or inside attic spaces, invisible from ground level. That's precisely why a trained eye matters. An inspector knows where wind and hail typically leave their mark, even when the surface looks fine. Why does knowing what to look for matter so much? Catching problems early changes the entire outcome for a homeowner. A thorough inspection helps spot early warning signs, communicate clearly with their insurer, and stop minor wear from turning into a major repair bill. A typical inspection covers: Shingle granule loss and cracking Flashing around chimneys and vents Soft spots or sagging in the decking Attic ventilation and moisture signs Gutter and downspout condition What should homeowners do after a storm? Storm season raises the stakes considerably. Richmond homeowners need a roofing company they can trust to assess damage accurately, walk them through the insurance claim, and install a roof built to hold up long after the storm passes. Ark Covering and Restoration relies on the same standard: high-quality materials paired with careful craftsmanship. That combination, backed by a proper inspection, gives homeowners a documented record and a durable roof they can count on for years. What Storm Damage Signs Should You Watch For? Curled, cracked, or missing shingles top the list of warning signs Madison County homeowners should not ignore. These exposed spots strip away the underlayment's protection and give water a direct route into the home. A roof that looked fine last season can hide serious damage after just one strong storm system. Granule loss offers another clue, though it's easy to miss from the ground. Shingles shed their protective granules over time, and after wind or hail this process speeds up dramatically. Dark streaks across the roof surface or a gritty, sand-like buildup collecting in the gutters both signal granule loss in progress. Is roof damage always visible from outside? No, some of the most serious damage hides inside the attic or behind walls. Water stains on ceilings, damp insulation, or daylight peeking through attic boards all confirm a compromised roof even when shingles look intact from the driveway. Richmond homeowners should check both the exterior and interior after any severe weather event. Flashing deserves close attention too. The metal strips sealing chimneys, vents, and skylights create some of the most common leak points on any roof. Once flashing bends, rusts, or pulls loose, water finds a direct path inside. Why do Richmond roofs get overlooked after regional storms? Madison County's weather doesn't always mirror what nearby Fayette County experiences. Storm cells sometimes track differently across this part of Kentucky, meaning Richmond roofs can sustain damage from systems that barely touched Lexington. We know to evaluate properties independently rather than assuming regional storm reports tell the whole story. Frequently Asked Questions When does a Richmond roof need a professional inspection? Roofs over 10 years old, recent storm exposure, and visible leaks or missing shingles all signal it's time for an inspection. Waiting until ceiling stains appear means damage has already spread past the shingle layer. How often should Richmond homeowners schedule roof inspections? Ark Covering & Restoration recommends annual inspections, ideally during spring or fall. This timing catches wear before winter ice or summer heat turns small issues into structural problems. Does Ark Covering & Restoration help with storm damage insurance claims? Yes, Ark Covering & Restoration guides Richmond clients through documentation and adjuster meetings for storm-related roof damage. This support helps homeowners navigate the insurance claims process throughout Richmond and Madison County.
After a storm, your roof can sustain damage that isn't always obvious at first glance. Knowing what to look for helps you catch problems early, communicate clearly with your insurer, and avoid minor issues turning into costly repairs. Here's a practical guide to identifying storm damage from the ground, the attic, and everywhere in between. Key Takeaways Missing, cracked, or curled shingles expose the underlayment and allow water to enter your home. Granule loss from shingles appears as dark streaks on the roof surface or as sandy buildup in gutters. Damaged flashing around chimneys, vents, and skylights creates direct pathways for water intrusion. Interior signs - water stains, damp insulation, or daylight visible through the attic - confirm roof damage even when the exterior looks intact. Ark Covering & Restoration in Richmond, KY inspects storm damage within 48 hours and provides insurance-ready documentation at no charge. Visible Signs of Storm Damage Most exterior damage can be identified safely from the ground - no ladder required. After any significant weather event, walk around your home and look for the following: Missing, cracked, or curled shingles - these are the most common and immediately visible indicators of storm impact. Granule loss — check gutters and downspouts for the small, sand-like particles that coat asphalt shingles. Heavy accumulation signals that shingles are deteriorating and losing their UV protection. Damaged flashing - bent, loose, or missing metal strips around chimneys, skylights, and vents allow water to enter at vulnerable joints. Sagging or uneven roofline - soft spots or visible dips often indicate structural damage beneath the surface caused by impact or prolonged moisture exposure. Dented or detached gutters - hail and high winds frequently damage guttering, which can disrupt drainage and lead to further water issues. Interior Signs Worth Checking Once you've assessed the exterior, move indoors. The attic is the first place hidden leaks reveal themselves - often before any exterior damage becomes obvious. Visit the attic during daylight with any artificial lighting switched off, and look for daylight penetrating through the roof deck. Check rafters, the attic floor, and insulation for water stains or damp patches indicating active or past leaks. Inspect the ceilings and walls on the top floor of the home for water stains, discoloration, or bubbling paint. Note and photograph the exact location of every stain or wet area to share with your roofing professional. Documenting Damage for an Insurance Claim Good documentation makes a significant difference to the outcome of an insurance claim. Begin recording damage as soon as it is safe to do so, and before any permanent repairs are made. Photograph all visible damage from ground level, capturing both wide shots and close-ups of affected areas. Keep a written log noting the date of the storm and when each area of damage was discovered. Avoid permanent repairs until an adjuster has inspected the property — temporary protective measures are fine, but permanent fixes can void coverage. Schedule a professional inspection promptly to prevent secondary damage from compounding the original loss. When to Call a Professional Roofer Some damage - compromised flashing, hairline cracks, and subtle granule loss - is easy to miss without a trained eye. If you notice any of the signs above, or if your home has been through a significant storm, contact a licensed roofing contractor rather than attempting a roof-level inspection yourself. Ark Covering & Restoration serves Central Kentucky communities including Lexington, Bardstown, Frankfort, Somerset, and Danville. Our team provides free storm damage inspections, photo-rich reports, and full insurance claims assistance, helping homeowners present an accurate picture to their insurer from the very first call. We complete code-compliant repairs and replacements using trusted brands including Owens Corning and DaVinci. Acting quickly after a storm protects your home and strengthens your claim. Contact us to schedule your inspection within 48 hours of any significant weather event. FAQ What are the most common visible signs of storm damage on a roof? Missing, cracked, or curled shingles are the most immediately visible indicators, alongside granule buildup in gutters and dented guttering caused by hail or high winds Where does granule loss show up after a storm? Granule loss appears as dark streaks on shingle surfaces or as an accumulation of small, sand-like particles inside gutters and downspouts following a storm. How quickly does Ark Covering & Restoration inspect storm damage? We aim to complete all storm damage inspections within 48 hours of the weather event and provide full documentation suitable for insurance claims at no cost to the homeowner.